Retro-1970s styling and power in a compact chassis.
One false start in the woodworking department blew away about three hours and a handful of materials, but the second attempt met expectations and then some:
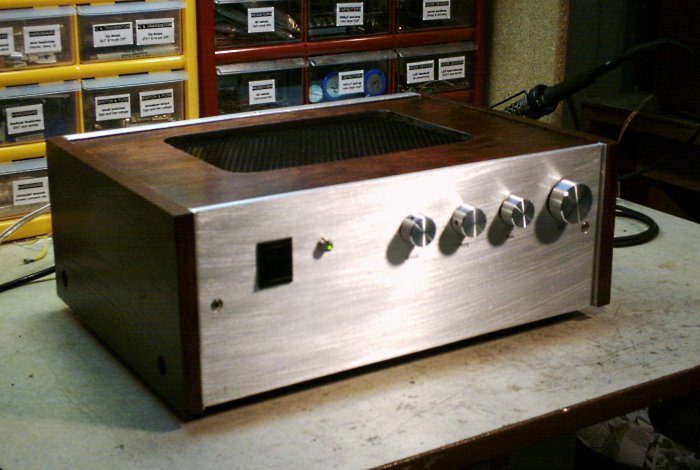
Figure 20. The completed unit.
Woo-hoo! I was delighted, as because this was the first time I had envisioned something in the planning phase and gotten better than ninety percent of it to materialize. The sidepanels were built from oak with cherry veneer caps on the front. The top panel was a section of plywood (recommended as thin materials are otherwise prone to warping over time) overlain with cherry veneer. All is glued together from the inside, stained with a mahogany oil tint, and finished with four coats of polyurethane interspersed by fine-grit sponge sanding. The vent screen is aluminum, painted gloss black.
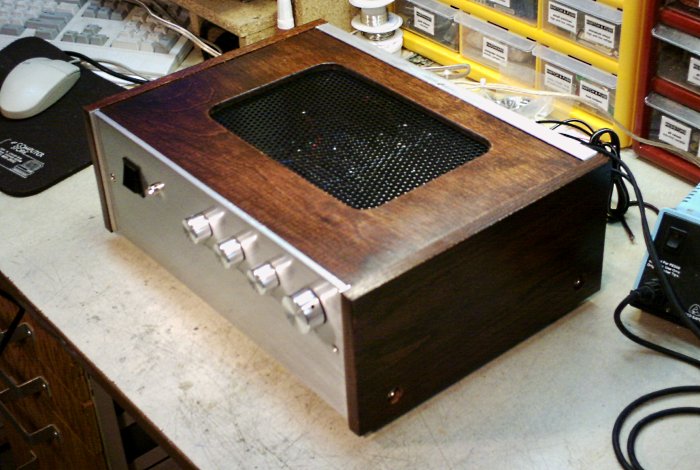
Figure 21. Another view of the completed unit.
As planned from the beginning, there are two screws on each side of the wood cover to secure the cover to the chassis base. Finally, a rear view:
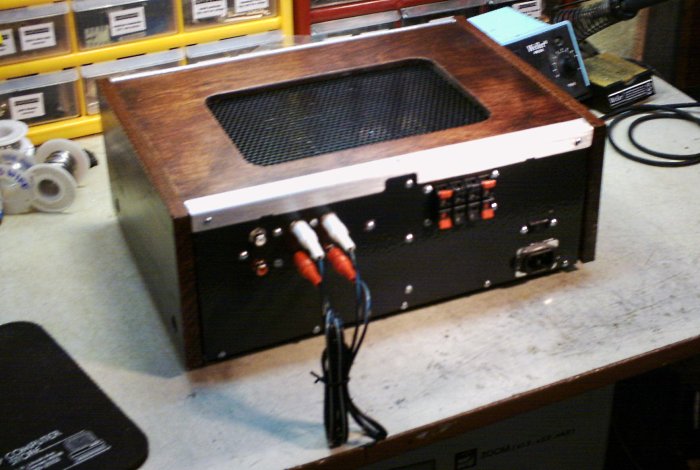
Figure 22. A view of the rear panel.
This is a bit rougher than I would like, but fortunately, it is also not visible most of the time. The loop feed was intended to be an interposing point between preamp and amplifier for the shaping equalizer. In practice, design issues in my grounding layout resulted in nasty hum loop when this was attempted, so the shaping equalizer sits in front of the amplifier, and its output feeds the main input jacks.
The aluminum L-bracket covers up a rough joint between the wood cover and rear panel, and also improves the overall stability. As with the front panel, the brushed look was achieved via sanding, and an acrylic spray coat was applied to protect it from oxidation.
The first of my "serious" projects was now completed, with about four months invested. The unit looks and functions as good as I had hoped for, my dad was pleased by the initiative (which was good, as I was underemployed and living rent-free at the time), and it saved a nice speaker system from relegation to attic storage. The preamp required post-assembly tweaking of a few resistor values to moderate the overall gain but the unit otherwise has been reliable under many hours of use.
This was a unique project for a unique application although the 'magnificent 70s' theme would be carried over somewhat when I built a Project 36 Class A amplifier at a much later date. With the possible exception of the Pioneer Elite series, mainstream audio equipment has never looked as good since those days.
aaronv dot net -at- gmail dot com